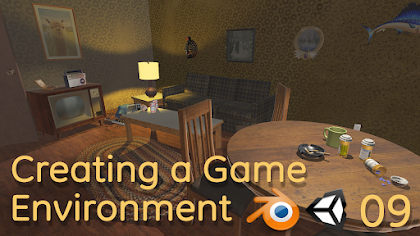
Creating Game Environment: Guide to modelling
A game environment refers to the setting or world in which a video game takes place. This can include the physical location, as well as the atmosphere, weather, and other elements that create a unique atmosphere and affect gameplay.
Game environments can be anything from realistic representations of real-world locations to fantastical or sci-fi worlds with unique rules and physics. They can be open worlds that allow players to explore freely, or more linear environments that guide players through a specific storyline.
Game environments can also have a significant impact on gameplay, influencing things like movement, combat, and puzzle-solving. They may also include non-playable characters, wildlife, or other elements that can affect the player's experience.
Overall, game environments are an essential part of the video game experience, helping to immerse players in a unique and engaging world.
Collecting assets for a game environment is a crucial step in the game development process. These assets can include 3D models, textures, sound effects, music, animations, and other visual and audio elements that are necessary to create a compelling and immersive game world.
Here are few steps you can take when collecting assets for a game environment:
- Determine the scope of your game environment: Before you start collecting assets, it's essential to have a clear idea of the kind of game environment you want to create. This includes deciding on the art style, the overall look and feel, and the types of assets you'll need.
- Create a list of required assets: Once you have a clear idea of your game environment, create a list of all the assets you'll need. This can include things like character models, props, terrain textures, and more.
- Look for asset libraries: There are many online marketplaces where you can find pre-made assets, such as Unity Asset Store, Unreal Engine Marketplace, and TurboSquid. These libraries have a wide variety of assets that you can use in your game environment, saving you time and effort.
- Hire a team: If you have a larger budget, you can hire a team of artists, sound designers, and animators to create custom assets for your game environment.
- Create your own assets: If you have the skills and tools, you can create your assets from scratch. This can be a time-consuming process, but it allows you to have complete control over the look and feel of your game environment.
Remember, creating a game environment is a collaborative effort that requires careful planning and attention to detail. By taking the time to collect the right assets, you can create a unique and immersive world that players will love.
Becoming a master in the skill of modeling takes time, practice, and dedication. Here are few tips to help you improve your modeling skills:
- Study the basics: Before you can become a master modeler, you need to have a solid understanding of the basics. This includes learning about topology, UV mapping, texturing, and lighting.
- Practice regularly: Regular practice is key to improving your modeling skills. Try to work on something every day, even if it's just for a few minutes. The more you practice, the more you'll get.
- Work with reference images: Using reference images can help you create more accurate models. Collect reference images from different angles and use them to guide your modeling process.
- Learn from others: Take the time to study the work of other modelers and learn from their techniques and processes. Look for tutorials and online resources that can help you improve your skills.
- Experiment and take risks: Don't be afraid to try new things and take risks with your modeling. This can help you develop your own unique style and approach.
- Get feedback: Sharing your work with others and getting feedback can be incredibly helpful. Join online societies or forums where you can reveal your work and get feedback from other modelers.
Remember, mastering any skill takes time and effort. With regular practice, dedication, and a willingness to learn, you can become a master modeler.
As a modeler, there are several tools you should master to create high-quality 3D models. Here are some of the most important tools you should focus on:
- 3D modeling software: The most important tool for any modeler is 3D modeling software. There are many options available, including industry standards like Blender, Autodesk Maya, and 3ds Max. Spend time learning the software and its features thoroughly, as each one has its own unique set of tools and workflows.
- Sculpting software: Sculpting software like ZBrush is essential for creating high-detail organic models like characters or creatures. It allows you to sculpt and shape your model in a way that is difficult to achieve with traditional 3D modeling techniques.
- Texture painting software: Once your model is complete, you'll need to apply textures to give it a realistic look. Software like Substance Painter and Mari allow you to paint textures directly onto your model and create materials that simulate real-world materials like metal, wood, and fabric.
- UV mapping software: UV mapping is the process of unwrapping a 3D model so that it can be textured. UV mapping software like UVLayout and Headus UVLayout can help you create clean, efficient UV maps that will make texturing your model much easier.
- Rendering software: Rendering software like Arnold, V-Ray, and RenderMan allow you to create high-quality images and animations of your models. Learning how to use these tools effectively can help you showcase your models in the best possible way.
Remember, mastering these tools takes time and practice. Focus on one tool at a time, and don't be afraid to experiment and try new techniques. With dedication and persistence, you can become a skilled modeler.
Optimizing a game environment is an important step in the game development process. Here are some tips to help you optimize your game environment:
- Optimize your 3D models: Use efficient modeling techniques and keep your polycount low. Avoid using too many high-polygon models in a scene and use LODs (Level of Detail) to switch out more complex models with simpler ones at a distance.
- Optimize textures: Use texture compression to reduce the file size of textures, and ensure that textures are optimized for the platform on which the game will run. Avoid using large textures with high resolutions where possible, and compress them into smaller file sizes.
- Optimize lighting: Use dynamic lighting sparingly, and instead use lightmaps to pre-bake lighting into your environment. This can help reduce the strain on the GPU and improve performance.
- Use occlusion culling: Occlusion culling is a technique used to reduce the number of objects that are rendered in a scene. By using occlusion culling, you can cull objects that are not visible to the player, improving performance and reducing GPU strain.
- Test performance: Regularly test your game's performance on different platforms and devices to identify any areas that need optimization. Use profiling tools to help identify bottlenecks and optimize accordingly.
- Simplify geometry: Simplify geometry where possible, especially in the background and distant objects. This can help reduce the load on the GPU and improve performance.
Remember, optimization is an ongoing process and requires careful attention throughout the game development cycle. By following these tips and regularly testing your game's performance, you can create a smooth and optimized game environment that provides an excellent player experience.
For details, see: https://bleedingedge.studio/blog/


.jpg)
.png)

Comments
Post a Comment